Monday, October 11, 2010

Birds of a Feather - Part II

Step II for Birds of a Feather was to make the Birds. Now just like every other kids I LOVED modeling things in school with playdoh and that clay stuff that would dry and then you would take the item home to give to your parent as a very "special gift". So this seemed like a no brainer - loved it as a kid - must love it as an adult - right?

Problem.......I forgot that as a kid when I molded things for my parents their acceptance usually started kinda like this........"oh how lovely Patti - it's ahhh.....well it is ahhhh...."

Not surprisingly that is somewhat how my first attempts at making birds with fondant went. Kinda wonky. However, to start out with I was being very careful about how much fondant to color. Didn't want to waste it because I was going to need it for lots of additional stuff - yet didn't want to make too little and have teenie tiny little birds. So I did what you see above - I pre-badly-modeled some birds just to get a feel for how much fondant to color.


Once I had the colors set I was happy. Course the three days later I realized that I needed to make yet MORE fondant for the rest of the cake that was in the same exact colors as the birds. Duh it would have been smarter to color all the fondant at the same time............Live and learn right?

After a few attempts I started to get the hang of making the birds. I saw some online that I thought were really cute and I fashioned mine off those........certainly the original ones I was working from were done by a fondant sculpting master, but given this was my second time really making shapes - I am pretty darn happy with the outcome.

Here is most of the Flock after I finished them and washed the fondant off with a bath of vodka and some tiny sparkly flecks.
And thus Part II of the cake was finished. So now just to wait a few days for the birds to set so that I didn't mess them up.


Sunday, October 10, 2010

Birds of a Feather - Part I


A few weeks ago I was offered the chance to make a SUPER COOL cake!! Some friends of our grew their family from 1 daughter who was 3 years old - to - 5 daughters who are all under the age of 4 (two 4 year olds - one 2 year old - two 1 year olds) all in less then a year.....but it has been about 2 years that they have all been together. The occassion they were celebrating? The finalization of the adoption for two of their daughters. Two are bio theirs and the final daughter is the sibling to the two becoming legally theirs. So it really was a wonderfully special occassion!!

The mom of this brood asked me if I ever do cakes for others.......do I ever do cakes for others?? Only when they ask!! And so it was that our family got to gift their family a tremendously important cake.

What to do - how to do it - what could be special enough to convey the day? The family asked for VERY BRIGHT girlie colors. After that I was told "do whatever you want" - but there was a hint that a tiered cake would be fun.

So my first picture is the stacking.....how big and how much........


The bowl on the top was for me to figure out how big to make my "special element". Since I was given full creative license I thought it would be fun to make a birds nest and have the ENTIRE family represented in a nest together at the top of the cake. So I needed to make a nest.

Making the nest I began by lining a bowl (as seen on top of the stack) with plastic.

Next I took some white melting chocolates and well.......melted them.........this time in the microwaved.


After they were melted I stirred them up until they were smooth. Then I took another step not shown and added a small bit of brown dye in the chocolate to make it more resemble the color of a birds nest.


Put all the chocolate into an icing bag with a medium sized tip and began to put the chocolate into the bowl - going back and forth making a random pattern - to of course look similar to a nest.


Once this was done I let it sit and harden. Tah Dah...........I don't have a final picture of the nest until later in the cake. The nest on the cake though is a darker brown - in the end I felt like this mild brown color was not holding its own against the bold colors of the birds and we ate this one.

Still - it was fun working to figure this out. And even more fun to see how excited the kids were about the final product.

Friday, September 10, 2010

Darth Vader got Iced

Ohhhhhh yummy chocolate cake.......this is a super yummy one too....Chocolate Chocolate Chip. Made extra moist. Now I am totally not a big chocolate cake person - cut me a piece of white cake or banana or something with spice in and a delish buttercream icing - but this chocolate cake is worth breaking a calorie count.

And this is the way we start a fun cake. This particular cake was for a friend of a friend. Her son was having a birthday party and loves........the ultimate kid fiend........Darth Vader!!

Honestly I had no idea what-so-ever how to make Darth Vader. Yeah I saw the movies, but there was no way I am ready to try to carve out his face and lay fondant over it to be 3D - so instead we went 1D with a tiny bit of 2D added in.

I found a good picture of Darth Vader online - printed that out to the size I was looking for. Then cut each shape as a template of the face - starting from the largest image - placing that on the fondant and cutting around it with a small knife. After finishing with one piece I would cut the template smaller for the next piece and just kept doing this until I had each piece for the face.

First I cut the base shape - then (if you look close you can see) I cut the helmet shape and placed it over the base - then another ridge along the face area to make it have some depth above the face. For the actual face I cut a few shapes to make it look like the face had some dimension too.

That done it still looked flat. So we added some shading..........

In the mean time I placed a layer of fondant over the cooled and icing crumb coated cake. Still learning how to lay fondant well - and rolling it out on a laminate counter top that has tiny little grooves no one notices until sugar adheres to it and your fondant gets stuck - you can see that the fondant is not PERFECT. However, I am excellent at figuring out how to forge ahead and fix stuff.
Yep - that is right - this bad boys face covered up the little holes that were made when I was laying the fondant out. It may also be noticeable that there is now some shading done on the face and Darth looks a tiny bit more realistic in a 1D fondant sort of a way.

After putting the face on the cake it looked a bit black and white - and maybe boring. So I brainstormed - alone - in my own brain - and tried to think of what else might work and not take away from Darth's image........what is another Star Wars kind of thing that would work??

Not long into the thinking it dawned on me.......Light Sabers!! One red and one blue. I guess if I were going with just Darth it would have been two red, but my 9 year old had entered the room by then and he said that a boy would want to have both so that he could pretend in his head that they were fighting. Really? Okay - I guess.

So once that decision was made the Light Sabers were added and the Birthday Boys name was added. He lite up when he saw it........yeah!


This cake was Chocolate Chocolate Chip (as I mentioned in the beginning) with a Vanilla Buttercream and a Vanilla Fondant.

Saturday, September 4, 2010

Wedded Bliss Cupcakes

Yeah Fondant!! No really.....I am becoming much more familiar with Fondant. Fondant loves me and I am begining to actually love Fondant too. This was totally fun because I was getting to try new things and create.

What I was doing was creating cupcakes for a 30th Wedding Anniversary party. Friends of Dave at work had asked me if I could do it. See Dave often takes in things that I bake, but don't want to eat, and shares. His friend knew I could bake and Dave had shown him pics of things I had decorated. Their "cake lady" was unavailable (hey maybe I can become someone's "cake lady") and they asked if I could help in the pinch. And his wife said I could do whatever I wanted - but she kinda wanted cupcakes - hmmmm........ahhhh Yeah Totally!!

So I searched some ideas. Again - I figure someone has already been there before me so might as well learn from some of their ideas. Found some really cute flower ideas and started rolling out some fondant I made. Cutting them into 3 sizes of flowers.

Then I pulled out some Vodka and some Luster Dust in the shades of Silver and Pearl. The theme items were all being purchased in those shades - apparently 30th Anniversary is Pearl. So I mixed the vodka and luster dust and began painting the flowers.

Once done they looked like this. I have to say that although it was a smidge time consuming - it was really fun!! and simple.

The cupcakes were all simple. Yellow and Chocolate. Easy........the icing was by request a Cream Cheese. Yummy!! So I topped each cupcake with a simple swirl of icing.

Then took the individual flowers and stacked them - using a smidge of icing in between each flower as glue and a small candy pearl in the center.

I have mentioned before that I don't always like to Reinvent the Wheel.....and this flower is not much different. The first flower I saw that sparked this idea was on the Bakeface blog that I love to follow. She has brilliant things that you might see me copy and these flowers are the start. You can see her creation that sparked my plan here.


Popped a completed flower on top of each of the cupcakes and Viola!! A completely cute cupcake that looks elegant and fun all at the same time. Of course, as cute as these were......they weren't exactly the whole party theme......we were missing 2 characters......

One of those characters was the Groom. Here he is with his box of chocolate cupcakes. How cute is that right?

And then there was also a box with the Bride and her yellow cucpakes.


I have to say that these two cupcakes were much easier to create then all the flowers - and they turned out really cute. Basic fondant layered over the cream cheese icing - then adding a few elements - the flower on the lapel - the buttons from fondant - the dress texture is thicker pearl luster dust painted on with a small amount of edible pearl colored glitter - and then a necklace of candy pearls. TahDah!!

Wednesday, September 1, 2010

Han Solo Would be Happy

This was a fun cake. I even did a good deal of picture taking correctly. A good friend asked me to do this cake. It was after much consideration though because she had hoped to do both Star Wars cookies and a Millennium Falcon cake for her sons party. Only she had never really worked her way into creating cakes or baking much yet. So in the end - and after I asked/begged to do the cake - she asked me to do the cake and she went forward with her plans for the cookies.

As you can see we started with a 1/4 sheet cake and a rounded cake. The rounded cake was done by baking inside of my medium size glass mixing bowl. Much easier then trying to carve a round shape.

Once the stacking was done I carved out the shape of the ship. Yes there was a lot of waste in thrown away cake - but better that cake hit the trash can then that it hit my families tummy every time a cake is carved - otherwise there would be a lot more Waist in my family (get it? Waste/Waist - it's early the jokes are lame). Still I was happy with the initial shape.


Having a life size replica of the ship - we have a toy Millennium Falcon the kids received a few years back with chunky Star Wars figures - very cute - anyway, the replica of the ship (not pictured) was helpful to look at. I used it to figure out where to carve in some indentations.

You can also see that I attached a cupcake as the cockpit on the side. Remember Luke in there shooting at the rebel fighters?

Finally it was time for the crumb coat - or dirty icing as Ben likes to term it (he watches a lot of Cake Boss). This was a task with this cake because there were so many crumbs due to almost every edge and surface being cut on that the crumbs made it really hard to get an even somewhat smooth surface.

But I moved forward. Created some of the indentations again over the cuts to make sure that when the final icing was placed it would not look too chunky.

And I walked away to let it dry. Sometimes walking away for a bit can make a mess look more reasonable when you return. I do this with any craft type project I have that becomes wonky in my head. Of course - the icing also had to set. If I had added the final icing over this it would have just mixed into the wet crumb coat icing.

Now honestly, when I first came back my head wasn't cleared up. The thing looked like a really badly formed soccer ball to me. Lucky for me I say things to my kids like "don't give up" - "keep moving toward the goal" - "never look backward only forward" - "you can do it" - "I believe in you". They all came by and said - "wow cool" and when they noticed my frustration they used my words to encourage me. And with that I moved foward.

Another fun thing about this cake. It was one of the first few times that I used chocolate as a decorating component in the cake. See the satellite dish thing? That is made from white chocolate chips that I melted and dyed the color of the icing. Using a small ramakin I covered with plastic wrap I smoothed some melted chocolate inside the dish - vaguely shaped it to look like a satellite and let it sit to dry. When I popped it out it was really cool. Maybe not perfect looking - but it worked perfect and it gives me hope to try stuff like that again on future cakes!

At the end of the project my kids and hubby were all cheering how great the cake looked. I have to admit - at the time it still seemed a bit wonky - but after walking away and coming back I even had to agree that it was very cool. I am my own worst critique and I had to pat myself on the back for completing this. The Birthday Boy - he loved it!! What a cool present to gift!

This cake was obviously Chocolate - no chips because it is impossible to carve a tiny chocolate chip. Vanilla Buttercream icing was the rest.


Monday, August 30, 2010

Coconut Deliciousness


Yummy!! Cupcake Break.

There have been a lot of cakes recently. Of course it is Birthday Season here. Still it is nice to take a break and try something different.

Since Chocolate, Yellow, White and Banana are consistently baked in our house I thought we should try a new flavor. Coconut. Someone that is considering asking me to make them a cake has requested a Coconut cake. I can honestly say that I have never made one. So I began the search for a cake that I could be willing to happily hand over to them.

The recipe that I settled on was one I found on the Food Network presented by The Barefoot Contessa -

Coconut Cake
3/4 pound (3 sticks) unsalted butter, at room temperature, plus more for greasing the pans
2 cups sugar
5 extra-large eggs, at room temperature
1 1/2 teaspoons pure vanilla extract
1 1/2 teaspoons pure almond extract
3 cups all-purpose flour, plus more for dusting the pans
1 teaspoon baking powder
1/2 teaspoon baking soda
1/2 teaspoon kosher salt
1 cup milk
4 ounces sweetened shredded coconut

Preheat the oven to 350 degrees F. Grease 2 (9-inch) round cake pans, then line them parchment paper. Grease them again and dust lightly with flour.

In the bowl of an electric mixer fitted with a paddle attachment, cream the butter and sugar on medium-high speed for 3 to 5 minutes, until light yellow and fluffy. Crack the eggs into a small bowl. With the mixer on medium speed, add the eggs 1 at a time, scraping down the bowl once during mixing. Add the vanilla and almond extracts and mix well. The mixture might look curdled; don't be concerned.

In a separate bowl, sift together the flour, baking powder, baking soda and salt. With the mixer on low speed, alternately add the dry ingredients and the milk to the batter in 3 parts, beginning and ending with dry ingredients. Mix until just combined. Fold in the 4 ounces of coconut with a rubber spatula.

I baked these into cupcakes - they took 14 minutes each. However if you were baking into cakes the batter could be divided into 2 pans and then baked for 40-45 minutes. This recipe and directions came directly from the site - no tweaking involved.


The icing was not the one listed on the site. I used a simple Cream Cheese icing. After placing a bit of icing on the cupcakes I topped them with a tiny bit of shredded coconut.

The result was delicious!!

Saturday, August 28, 2010

Kid's in the Act


In the previous post I talked about how excited Andersen was to play with the fondant for her birthday cupcakes. Ben and Dawson wanted in on the act too. Originally Ben was going to help make some bugs for the cupcakes, but siblings will be siblings - or perhaps Andersen was channeling my "I was asked to make this" speach and saw her cupcakes as a reflection of her own artwork. Whatever it was.......Ben was left without a cake to decorate.

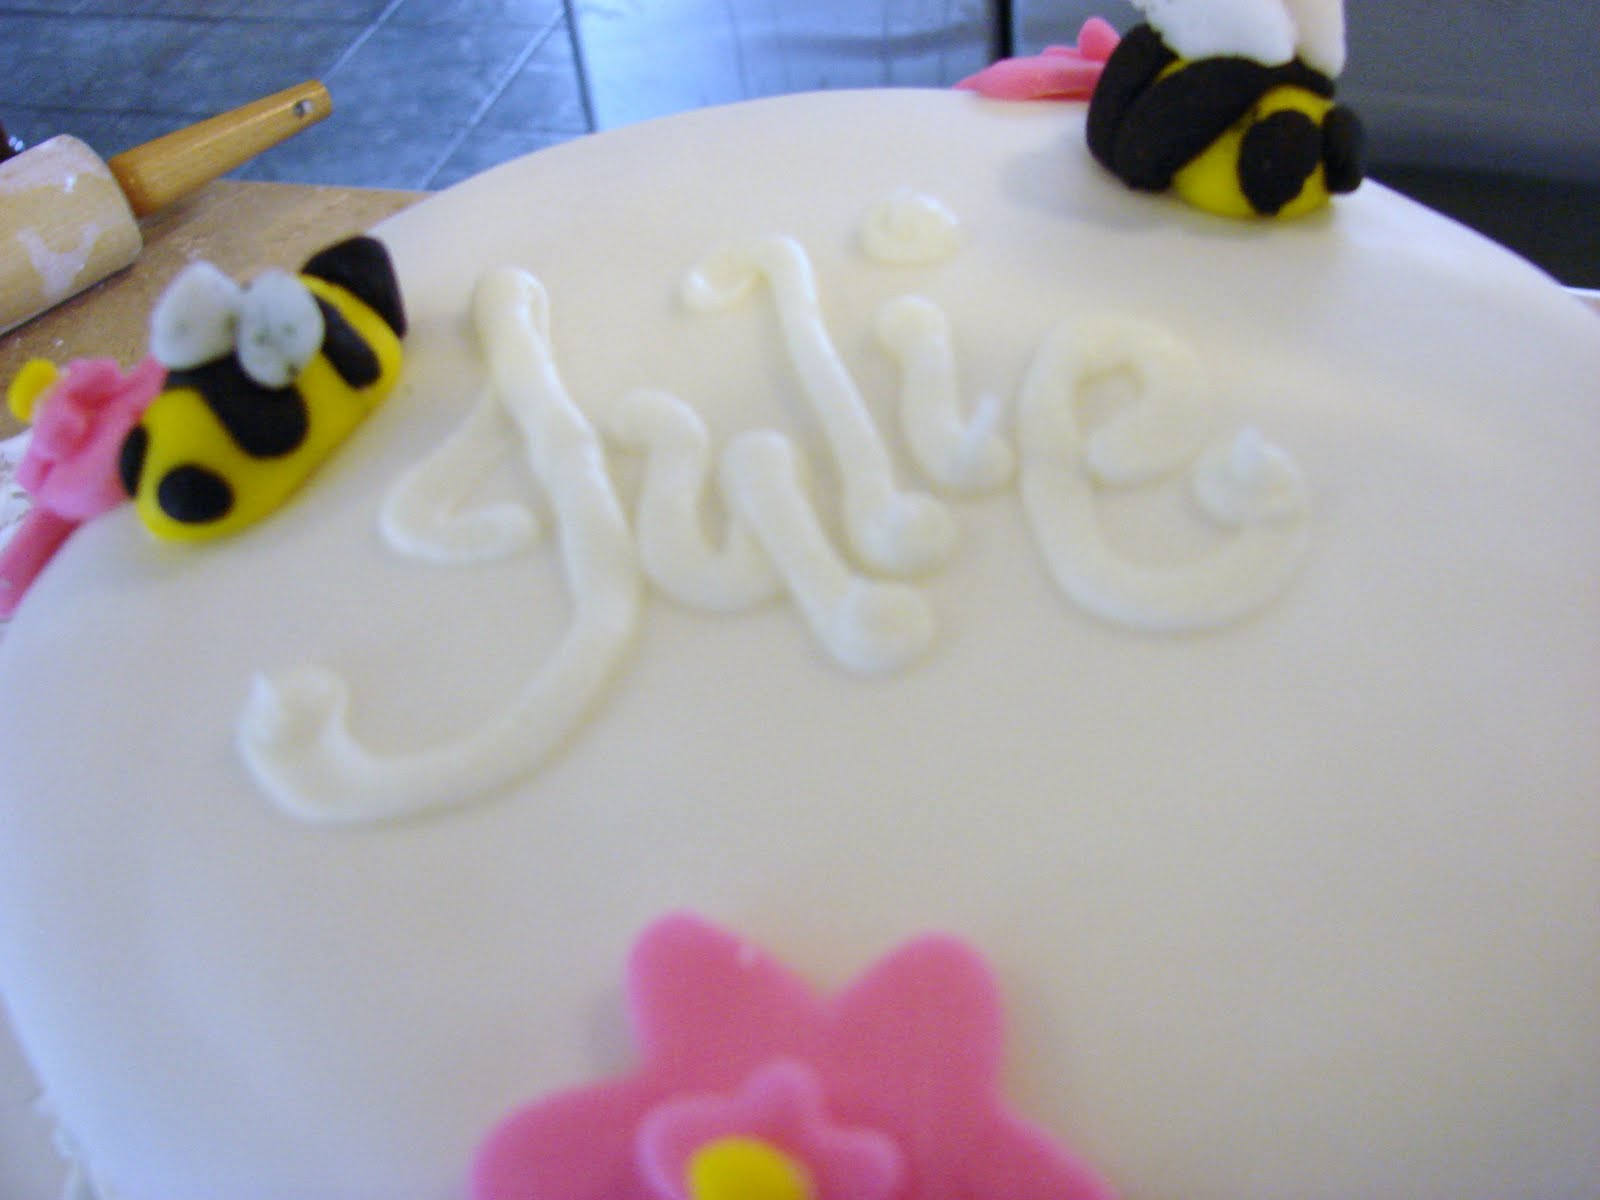
This wasn't a problem that took long to solve. We had fondant, we had willing hands and I had a friend who is always doing sweet things for me and LOVE LOVE LOVES cakes wrapped in fondant. Add that all together and you have a cake for Julie in the making.


Since this little cake was certain to be eaten quickly and it was single layers stacked - I skipped the need for a cake board in between or any dowel rods. We simply iced the cakes - wrapped them with fondant - and then stacked them.

Ben created some Bumble Bees and Flowers. This was his first time - I can tell he made a Bumble Bee - and honestly.......there are many cake decorators that I have noticed can't replicate a figure to save their lives and STILL sell the cake. To me that means that Ben is on his way to being an A #1 decorator.


The cake was simple and not incredibly perfect. Still it ended up being cute. Julie loved it - it was a surprise. Ben and I both got some fondant practice in. Win Win all around.

The cake was Julie's favorite - Chocolate - with a butter cream icing to attach the fondant - and a Vanilla Fondant.