Showing posts with label 2D. Show all posts

Monday, April 16, 2012

Take Me Out To a Baseball Cake

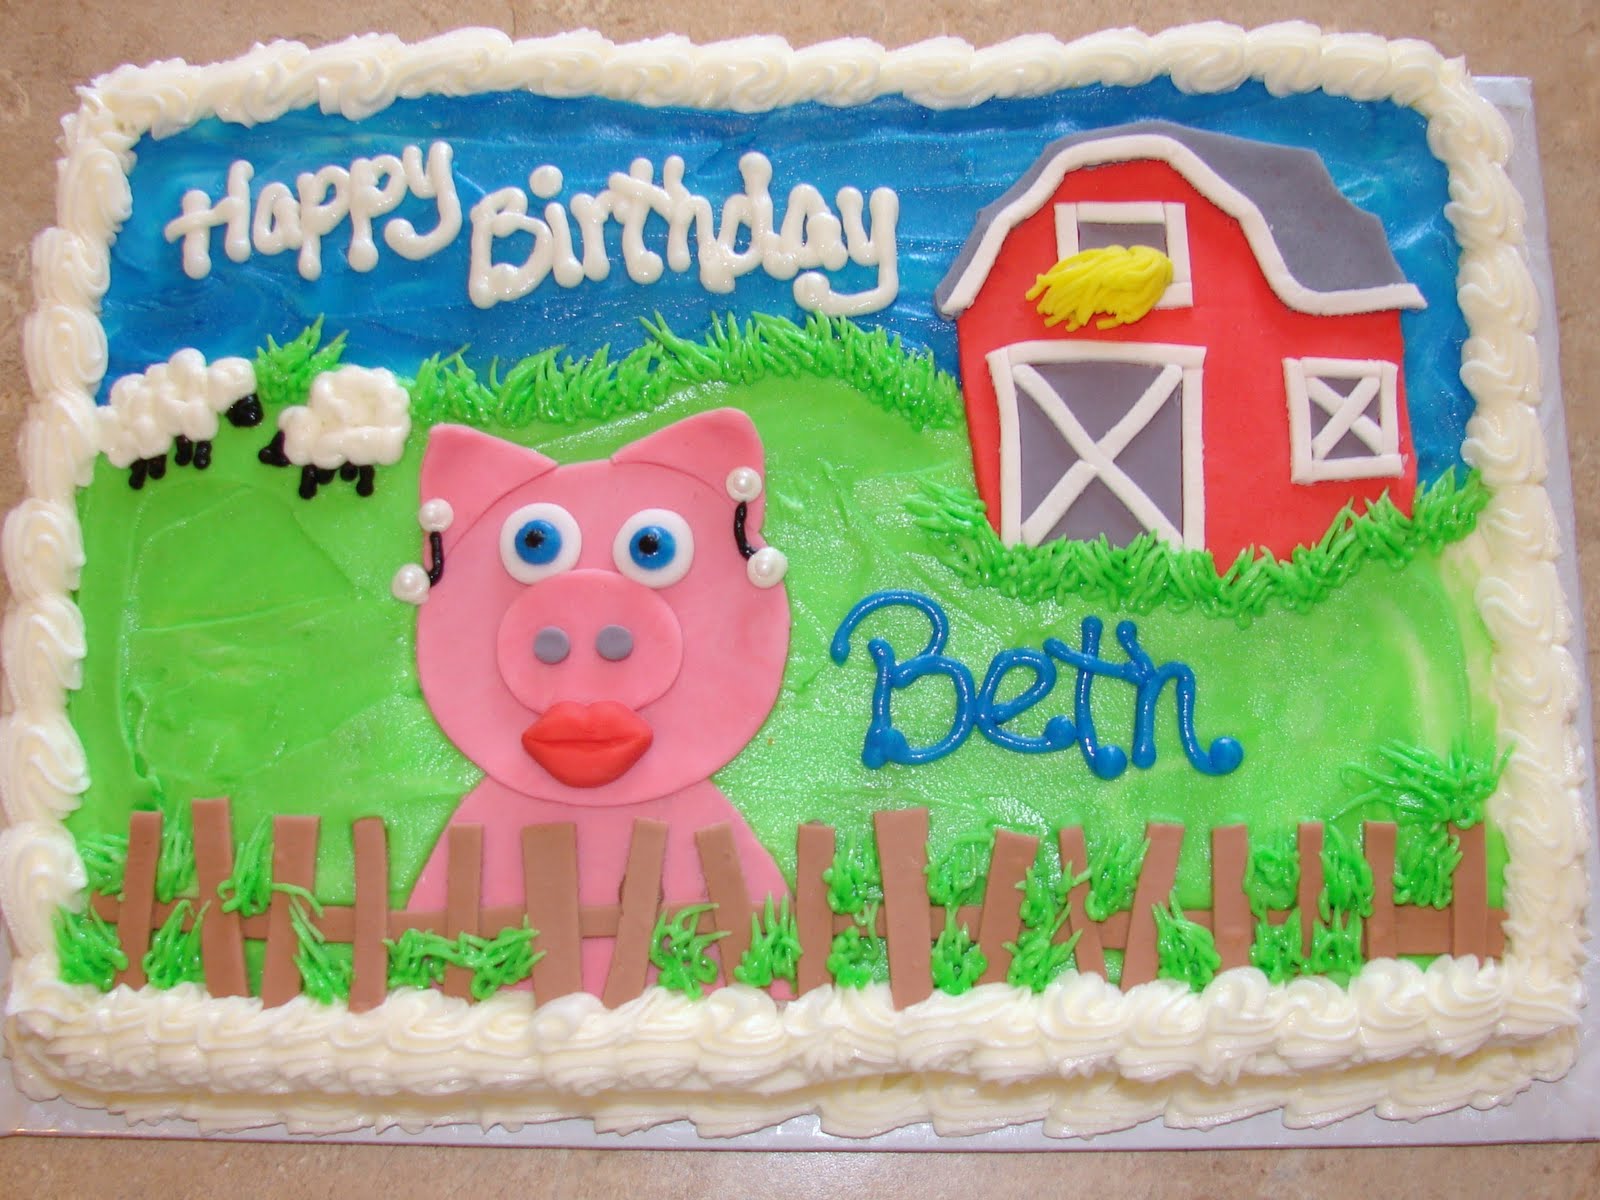
This was a fun cake to make..............a few months ago. OHMYGOSH I have become so awful about posting cakes that my friend, Catherine, has chided me about keeping them updated.
Ah well - what can I say? I am a busy person with too many kids and an inability to say "No" to things. Eventually I will get cakes posted...........and honestly........I cheat on the blog with my Facebook blog page. It is kinda easy to post stuff up on that and I get a little lazy about doing it here too.
Regardless - this was a fun cake to make for my friend Angies son........

Saturday, July 16, 2011

How to turn your Hand Red

For heaven's sake!! I was searching through my lists of posts on this blog to clean anything up that was sitting around and found these pics ready to be posted! Holy cow this is from like January or February - well I think the cupcakes were Valentines so totally February.

What is this thing? Well this is a picture of the FABULOUS gift my Mother-in-law gave me for Christmas. I really really wanted this. It is an airbrush. Now I am not new to airbrushing. In High School I airbrushed in my drafting and architecture classes. Well really it was in architecture. Remember - I mentioned before that I took drafting/arch all through High School. Mr. Jackson, our teacher, was kind enough to kinda make up - fashion - create - new classes for 6 of us (was it 6? Kelly, Mike, Fred, Brad, Me....Steve may have been in it too, but he wasn't in our specific group of every year together in the class - so I guess it was 5). By the fourth year we had kinda run through most of the classes I think - there was Drafting - Arch I and Arch II. Hmmm...it was 25 years ago.....maybe there were 2 Draftings and 2 Arch, but since each class was a semester there were really 8 semesters and - well like you really care anyway.......so there was a group of us who took a lot of drafting type classes and Mr. Jackson liked us all enough to keep us going with new areas of the field to teach us - plus he took us to yearly competitions (cool). Toward the end we were creating the exterior plans and then using different mediums to create the presentation - like markers, pencils, water colors and AIRBRUSHING.

Based on the grades I remember receiving I was pretty darn good at all the mediums except.....yes.....Airbrushing. I can remember Steve was excellent at airbrushing - in fact I am fairly sure he opened a tshirt shop where he airbrushed art work onto tshirts like they do at Six Flags. Okay maybe not.....but it is a possibility that it happened. I will ask Mary Jo - she always secretly crushed on him.

So I still keep in touch with Mr. Jackson. FB is a wonderful thing right? However, even before FB I had been in contact - visited - things like that. He had been following my cakes a bit - sending me some ideas and things. Both He and Dave had brought up the Airbrush and the thought that using it might open up some decorating techniques for me. Sounded fun - just needed to get one and at the time I wasn't doing enough "cakes for friends" to buy more then the supplies needed to bake a cake........so I put it on my Christmas list and my wonderful Mom-in-law made the purchase. YEA!
Anyway - back to my brand new totally coveted and wanted Airbrush. I opened it - it looked the same as the one I used in HS. And then the paralyzing fear of it came back. The AIRBRUSH. My classroom nemesis. I hated the Airbrush. How could I have forgotten how much I DID NOT like the Airbrush??

I mean look at the direction picture that details each part!! Ugh. The first day Mr. Jackson gave us the airbrush and had us dismantal it and then put it back together after identifying the parts and figuring out what each one does. Ugh. Now I have to do it again......the flash back fear of a test became overwhelming. However, I was determined to figure this thing out......to see how using it could open up new cake decorating techniques. Only that week I had seen them airbrush the tops of cupcakes quickly and easily........and I was donating about 100 cupcakes to various classrooms at our school for Valentines - so airbrushing all of them vs actually mixing enough red dye into buttercream made sense financially as well as in time.

So I didn't close the airbrush casing........I kept going.........Finish Strong is what we tell the kids.
But then I found the directions.......Ugh.......they were so long!! And there were all these various pieces to deal with........ugh.......

But then I looked closer at the pieces........with the flash back of test anxiety came a flash back of recognition as to how to put together all the pieces of the airbrush. So pushing the directions aside I picked up the airbrush pieces and assembled it. Hey this wasn't so hard - 25 years and I could still build an airbrush - Whooo Hoooo Me!!

But I should read the directions.......But I didn't want to........They were long.......They were boring..........They weren't as fun as just sticking some of the food safe dye into the airbrush and Going For It!! Who needed those stinkin' directions anyway!! I took Architecture in High School and I already KNEW how to use the airbrush.........I am Airbrush Woman watch me CREATE!!

I poured the correct amount of dye into the pot. Closed it all up. Set it for spraying things. Put a cupcake on a plate and..........
Well and then I totally missed the cupcake on my first try.

The second try was a little bit better.........but almost as lame as the first try. I counseled myself into comfort by saying this was a "lack of reading the directions".......no, this missing thing was more just a rustiness due to the 25 year time span of NOT having to use the airbrush in class.

After about half the cupcakes I started to get better. There were certainly blotching spots on some because my hand didn't have the grapse of slowly pulling back the trigger to release the dye, but with each cupcake I became a smidge better. Ben came by and wanted to try - so I let him. His were worse then mine so I patted myself on the back and said in my head, "See don't feel poorly about the way yours look. They are WAY better then his look!".......of course he is a 9 year old boy who has never in his life touched an airbrush.....and they only looked an itty bitty bit worse then mine........and he had the sense to say, "Hey if we add a few of those tiny chocolate chips you have on each cupcake they will look even better"......and he was right.


In the end he was probably the better airbrush artist.


Once they were all sprayed it was time to clean the airbrush. AGAIN I pulled those instructions out and looked at them. Geez O who needs directions.......I cleaned the airbrush out a million times. So I started the process of cleaning this one out. How hard can it be? Well honestly - not hard at all......unless you don't really remember HOW to clean our the airbrush and you are kinda just winging it based on the fact that you are too dang lazy to read the directions.


And with that.........

I turned my hand red.
And the counter. And the cloth that I had to use to clean the counter up. And 2 other cloths too.


Now you may be wondering........Did She Ever Use The Airbrush Again? Bet you think I didn't. Well you are wrong. I have used it, but not much to be honest. I am utterly scared of the thing. I saw on line that my absolute favorite cake decorator - who I have pilgrimaged across the country (okay only from IL to TN) to meet in person at her shop - was setting up an airbrushing class with a cake decorator who is in those competitions and teachers.......but I can't just drive to TN for a class.......and I couldn't find one around here. I should mess around with it more though because I have seen some seriously cute things done with an airbrush on a cake.


Now are you wondering did I read the directions? What do you think?


Of Course Not!!

Tuesday, July 5, 2011

A Sweet Cake for my Mom

This is a fun cake that I did for my Mom. She was coming to visit and she was the first baker I ever fell in love and awe with...........but she lives 2.5 hours away..........so I never get to bake for her or have her taste test anything that I make. Anything I am goofing off with and trying to get feedback on I take to friends who love dessert and are honest (or at least I think they are honest) about what might make something better or if I got it right the first time. My mom lives too far away for that. And she lives a little too far away for celebrations like Mother's Day or Birthdays. Sometimes we get to see her on those days, but not always. This year was a "not always" year since she went out of town for Mother's Day and the kids were in a production here in town on her birthday in December. I owed her a cake.

Now I mentioned in another post that growing up when we had cake it was primarily White Cake with White Icing. This is my mom's ALL TIME FAVORITE cake. When we have a celebration that is centered around her we KNOW that it needs to be White Cake with White Icing. Hands down done deal - or you have messed up. But I really want to share my other flavors with her so I took a risk and decided to mess with her White Cake standard............I added some Cinnamom. Because I know she loves Cinnamon (probably where I got the Cinnamon belongs in everything - but not my husbands meat rubs - gene).

So this cake is a Cinnamon Cake with a White Icing (Vanilla Buttercream). I made the cake - Iced it white - and then looked at it.


I wanted to turn it into something pretty. At the same time my mom does not love fondant. Even though I have been told my scratch fondant is yummy - fondant is not White Icing. Yeah, icing is under the fondant, but it changes the texture if not the whole flavor. So fondant as a cover to create something that is "my mom" was out. Then I thought about flowers. Second to her basket and quilting (they are interchangeable hobbies) is her ability to grow things. Veggie gardens and flowers are a call to fame for her in my eyes.

Delicate looking daisies it was. As I was getting the fondant ready for the daisies I thought about color. White - Yellow - yeah those are perfect............but a Raspberry/Plum is "Her" color. I can remember as a kid she always had a shirt in that color. Mom said it was "Her" color. Then when I was a teenager she bought me one of my all time favorite turtle neck sweaters. It was a Raspberry/Plum color. I am fairly certain I wore that sweater in the winter months for about 10 years. As the weave began to stretch a bit and make the sweater longer the style of leggings came in and it changed from a sweater with jeans kinda top to a sweater with black leggings kinda outfit for the clubs. Mom had one to match - only she never came clubbing with us. And yes, I was the dork girl at the club with a turtle neck on..........I rolled with the idea of leaving a bit of mystery to what was under my clothing.......hoping to instill that dress code in my kids (especially my daughter).

So the flower color was born. It was the perfect combination to be a perfect cake for My Mom (in my eyes). Simple - Elegant - Beautiful. Just like My Mom.


When my mom came I envisioned us waiting for the kids to come home from school - sitting and celebrating her and then having a piece of cake. Only none of us was really hungry because - well we just weren't. However, the bigger problem was that Mom didn't want to cut it. She said it was too pretty. So we boxed it up and sent it home with her - with a promise from her that she would tell me what she thought of the flavor. Because for me part of the point of it all was to share a bit of what I am doing with her. The next day I called to see how it was. She said she still couldn't cut it because it was so pretty. She was going to lunch with girlfriends and was baking .............cookies............for the gathering and thought she might take the cake with her to share. The day after that gathering she called and said the cake was a hit. Everyone loved it and she didn't have any leftovers. And that she loved the flavor - plus she was approached by friends to have me make cakes for them...........until they realized I lived 2.5 hours away.


This cake was ........Cinnamon with a Vanilla Buttercream icing and Vanilla Fondant.

Wednesday, June 29, 2011

Pig Cake

THIS is why I love to do cakes for friends who are really past the "getting to know you" stage. They are so 100% comfortable that they will ask for just about anything that pops into their heads..........like my kids.

A friend bid at a school silent auction for a cake that I put in the hat for sale. When she called she had been thinking about what she wanted. It went something like, "I would like to get a cake that has a pig on it in a farm scene." My response was, "Okay no problem" and then she added, "But the pig HAS TO HAVE RED LIPSTICK on."............my response was "What shade?" - because I totally admire anyone who wants more then Happy Birthday written really pretty.

I could include pictures of this cake from different angles.........but let's be honest - this cake is all about the pig (although I really love the sheep).

The cake was a half and half - Chocolate and Yellow. Vanilla Buttercream Icing. And lots of fun and giggles for ladies who work together and often say, "You can put lipstick on a pig, but it's still a pig." to each other.

Friday, June 24, 2011

Princess Castle Cake

Here is a cutie and a Quickie. I really wish that I took more time to take pictures of things as I put them together. Because the one thing that I am really giggly happy about this cake is the edging on each tier. Kinda like a railing to keep the princesses from falling over the edge........

Yet at the same time totally similar to a Crown.........yet completely edible. The person who asked me to do this cake sent a picture - and I was doing a sort of a copy job of that cake. As I looked closer at the cake I realized that the railing and the windows were plastic add ons. Disappointing, yet at the same time understandable - but copyable too. So I tried. I am pretty sure I got it. There was also a purple crown at the top (that I forgot to take an aerial pic of!) and a flag that went into the center and had the Birthday Girls name on it. Those things were given to the family to put on right before the party......so no pics for me, but safer for Michelle so she didn't have a crying princess.

Speaking of Princess - Michelle had a totally clever idea! In the original cake all the windows held princesses. Michelle sent a note saying, "What if we add my Princess into one of the windows?"..........Totally Clever!!! and.........Why Didn't I Think of That!!?? See her in the window above the door?? So cute!


I love it when the people asking me to do a cake have specific and clever ideas of things. Makes it more fun!


this cake was Chocolate in one tier and White in another tier. Vanilla Buttercream icing (we were trying not to cover the cake in fondant) and then Gumpaste for the railing crowns and Vanilla Fondant for the other additions.

Saturday, May 28, 2011

Girl Scout Bridging Time........

Seems like lately I have been getting the option of making cakes with buttercream again. Nice and fun and honestly ....... a bit less stressful. Although both mediums are a hoot.

This cake had an added element of fun. My friend, Julie, asked me to do the cake - but then she added in that she also wanted to watch me do the cake.........which I will be honest about made me a bit nervous to have someone intentionally watching me do a cake. My kids - yes. My mom - yes. My mother-in-law - yes. Hubby - yes. Anyway - the point is that no one has ever really stood and watched. But it was someone who wouldn't make fun of me and someone to talk to that wasn't 11 and under - so bonus right?

Julie came over and the cake decorating began. She was such a cool cheerleader to have!! And then even better..........she wanted to try it out. So this went from my doing a cake for her and her watching to HER doing the cake too!! She helped with most of the center art. I started it and she said I was making it look so easy (which it is) that she wanted to try - so she did. And she seemed tickled that it really was easy. See if you can draw.......then you can draw with any medium - icing is just another type of pencil and cake is just another type of canvas.

In fact - Julie also did all the names of her Girl Scout troop. And then the next week she made a cake for a little girl who is very special to her (and I was jealous because I love the spunky little Bailey and had secretly hoped to make a cake for her) - but Julie's cake was dead on fabulous Rapunzel!!

So maybe some day Julie and I can start a business?

This cake was half Chocolate and half White. Vanilla buttercream for the icing AND for the decorations! Great job Miss Julie!!

Tuesday, May 24, 2011

Sports Theme Baby Shower Cake

Here is a fun little easy buttercream iced cake that was set for a baby shower party at our elementary school for one of our teaching assistants. Not too long back I was asked by my sister in law to do something in a sports theme for her sister for a baby shower and I started searching Sports Theme'd Baby Showers. A cake popped up that had a border of various balls used for sports and I filed that away in my head.


Then when my friend, Tim, husband of Catherine, asked me if I would make the cake for the teacher and that it was going to be a baby boy and they would do sports.........I already had my idea.


I took some fondant and shaped some easy baseballs, footballs and golf balls. You can't see it, but the golf balls have a texture to them. Supposedly making them more golf ball like.


Then I drew a bunch of green and blue lines - AS YOU CAN CLEARLY SEE. Cute & Easy!!


This cake was half Chocolate and half Butter. Iced in a Vanilla buttercream and just a touch of vanilla fondant for deco.

Sunday, May 22, 2011

Henna Thank You Cake

This was another quickie cake that I did. I know - you probably look at this and think "Quickie? Is she nuts?" Really though it did not take NEARLY as long as the cakes that need all the little pieces cut out and dried and delicately placed. It was truly a Quick Cake in comparison!

The way it came about was not expected so it had to be Quick. My friend, Julie's, mom, Waiva, used to make wedding cakes. Lately as I have been asked by friends to do fun cakes for their kids she has noticed some of my things - and Julie, who is a photographer, had asked me to do some cute bride & groom cupcakes for booth at a wedding show. Her mom ate a few and then decided to give me her cake baking pans. Just because she is sweet - well and she wasn't using them anymore. Having those pans cuts my baking time in half when I am doing something with 2 layers. I soo soo soo appreciated it.

While I was using them for the first time - and it was a super busy week with tons of stuff the kids were doing and a few too many cakes to fit into that frame - I thought - these pans are AWESOMELY helpful - when it is her birthday I want to make her a cool cake. So I called Julie and said, "Hey when it is your moms birthday let me know so I can make her cake." She responded with, "Really? Because her birthday is the day after tomorrow." I responded with, "Really? Great."

So an easy cake was needed. Julie has a LOVE LOVE LOVE for fondant - I knew her moms favorite color was purple..........so the cake would be purple. In trying to figure out what easy design I could put on the fondant I remembered a cake that I saw in a Charm City Cakes book I read. So I searched it and while it wasn't easy to find I did find Henna Art - which is what was done to the cake. Another search for Henna Art Cake brought a picture up that kinda displayed the cake I was looking for - at least enough to give me a green light in my head on the idea.

So I whipped up some Royal Icing and start piping it on the cake in a Henna design. It turned out pretty cute I thought. The kids came home from school and were all in awe about the cake. Even Dave thought it was super cool. That made me realize it was a hit.

I even got to deliver it to her mom that night while they were preparing for her birthday dinner - so I thanked her personally for her gift to me by gifting her a cake. A Cake for a Cake Maker. Sweet right?

This cake was Chocolate on the bottom and and small White cake on the top. All covered in a Vanilla buttercream icing and Vanilla fondant with Vanilla Royal Icing.

Friday, May 20, 2011

Phineas

Okay here is another cake I have been sitting on for awhile. I posted the finished cake on my facebook blog link, but never did get it up here. This cake was fun. Michelle - the person who asked me to do it - found the base idea of the cake in a seach, but she wanted it tweaked a bit to include 2 themes - Phineas & Ferb at the beach & Dr. Doofensmirtz and Perry on another layer. But most of all we both wanted to see the "Logo" for the show on the cake........so I started by staring at it and thinking "how will I ever copy that to look authentic". After I did that for a few minutes I made fondant and began the process.

Being kinda caught up in what I was doing I forgot to take pictures (sound familiar). Honestly though my camera has more sugar on it then the cereal my kids are eating these days - so it might be better that I don't take pics during the process - for the life of my camera!

To create the logo I used an Egg Shaped cookie cutter and a tiny Oval shaped cookie cutter. Then matched the fondant up. I also printed the logo out 2 times. One was for referencing as I put things together and the other was to size that I wanted to make the logo for tracing the words Phineas & Ferb.
So basically - I cut 2 layers of the background orange. I placed the sucker pop sticks that I use for Cake Pops in the center of the 2 layers and adhered them to one another with Caro syrup. Then I placed the yellow layer and the small red dot in the middle on top and let it sit for a bit. (I am only NOW noticing that I forgot to pipe "and" in the red dot).

While that was drying a bit I rolled some gumpaste out really thin and let it set up (dry) a bit. This doesn't take long - maybe 5 or 10 minutes. Long enough to read a short book to a 5 year old who will hardly make it to the end of the book. Then I began cutting the letters out. Layed them over the top of the fondant and cut them out with a very sharp knife - or exacto knife. Once these were done I layed those on top of the logo to complete it. Phineas's hair didn't want to stay up and since it sits on the edge I decided that while it was drying for the next few days it would have a support - so I tucked some papertowel underneath it.

Then a few days later I began to assemble the cake. The top layer was Phineas and Ferb at the beach surfing. This is very close to a copy of the original cake Michelle brought to me.


The bottom layer though is different. In the version she and I decided I would create we did a lab for Dr. D and Agent Perry to be in. I asked my 9 year old what things a kid would expect to see in Dr. D's lab..........he said he had no clue. What??? He watched Phineas and Ferb for 2 hour stretches - kids. In fact he informed me that he really wasn't that "into" P&F anymore. Which I guess meant he was sleep watching all those episodes the day before. Kids.


Michelle and I agreed there would need to be a computer screen that said the birthday boys name.........

After that I figured there would need to be a Ray Gun and a few computers. It was fun looking at images of Dr. D's lab and then trying to bring them onto the cake with fondant.


One image I saw over and over was the lab - or some kind of a dome shape that looked like maybe it was a view from outside the lab? I wasn't sure, but I thought it looked fun to copy so I did. Later Ben came in when the cake was done and looked at it. His eyes lit up and he said it was totally cool. He walked around the cake and pointed out various things I had put in the lab and named them off - so I did copy the lab in a way that kids would recognize things - yea!!


And since this cake - Ben has found a renewed love for Phineas and Ferb. He has been watching it a lot lately. Sweet because I kinda like the catchy songs they sing.


This cake was chocolate on the bottom with a Oreo cookie buttercream center - and white on the top with a vanilla buttercream. All topped with a vanilla fondant. Yum!


Thursday, May 19, 2011

Confirmation Mosaic

So it is that time of hear........Confirmations, First Communions, Baptisms.........so many fun celebrations. A friend asked me if I would make a Confirmation cake for her son. Well originally in my head when she asked I thought it was for her daughter - and I proposed a nice white cake with a pink background and beautiful small roses........it was really pretty in my head.

And she totally agreed - but then she pointed out it was for Nate and not for her daughter so Blue themed might work a bit better. I poked around on the internet to see if anyone had come up with a brilliant idea for making a cake seem less girly for Confirmation. And I found a cake that wasn't for Confirmation - but it was a mosaic. This made me think of my friend Jeanette and all the beautiful mosaic's she does on her blog - Jeanette Eats Spaghetti and an idea was born. That is what I love about this cake art hobby - you literally can bring any other craft you do into a cake decoration.


I knew it would take me forever to do a mosaic all over the top of the cake - so I just did a small border of pieces around the main focal point of the cross. Which, by the way, I printed my own stencil out on paper ...........


So I did the most eye catching piece of mosaic on the side of the cake. Now......if you clicked over to Jeanette's blog and looked at the lovely tray that she mosaic'd (is that a word?) then you will see she used all her empty space. Me - not so much. But it was my FIRST time doing a mosaic. Now I would love love love to do something outside in our yard this summer. I am already looking about plates to break........


This cake was Chocolate with Vanilla buttercream icing and a touch of vanilla fondant.

Saturday, May 7, 2011

Batman........Make Your Own Template

There are SO MANY totally cool tools out there to use on the market in order to make MILLIONS of neat designs on cakes!! Believe me.........I search them for fun in my spare time and think.........wow that would be cool to have. Save it to Favorites on my computer (which drives Dave mad because I have a never ending list if you click "favorites" on my page on the computer - but I can find everything in a heartbeat so it works for me).

A few months ago I bought a Cricut for fondant. Also very cool. Used it 1x. Probably I will use it again - eventually - hopefully! because the dang thing was $100 (I used Christmas money that I had sitting around for those of you who know I am too cheap to splurge on things - and a 50% off sale - bonus right?). So anyway - the box ......... and tons of blogs ......... said that I could use it to make every design possible - which may be true - however, you have to buy a million cartridges to do this - which my friend, Julie, apparently has - but who preplans this stuff? Oh yeah, me. I do preplan, but I don't gather all the materials needed in time all the time.

Plus - honestly - making my own template free of charge is often Quicker - Easier - and more Accurate as to what I am looking to make. CASE IN POINT - This Batman Cake -

All I wanted to do was a simple Batman Logo. So like any techie I searched it. Then I copied the picture and pasted it into a Publisher document. Easy enough right?
Then I baked a cake (okay you caught me - the cake was baked already - and cooled - and iced - and I had already placed a beautiful topper of fondant over it). Ready to be CREATED into something...........

I printed my Batman Logo out. If I were doing buttercream then I would have kept the logo close to the cake as I freehand drew it onto the cake in buttercream icing. Hard to do, but doable.


However, for this cake I was going the mildly easier route and using fondant. So I used this template in STEPS.

Step 1 - cut the template out around the larger black oval - toss white paper into recycling and then place on black fondant and cut around the oval.


Step 2 - remove the same template off the fondant and then cut the template around the yellow oval - toss black trim paper into recycling and then place on yellow fondant and cut around the oval.


Step 3 - remove the same template (are you getting the hang of this?) off the fondant and then cut the bat template out of - toss the yellow trim paper into recycling and then place on black fondant and cut around the bat.


Step 4 - Assemble all those pieces on top of one another in the center of the top of the cake.


Voila!! Easy - AND - Free.

Then I added the birthday message and did something cute, easy & similar to the sides of the cake..........


I rolled more black fondant out and cut it into different shapes - squares, rectangles, points, and placed them along the sides to look a bit like a city landscape. Used some yellow royal icing (dries faster then buttercream) and dotted the city to look as those it were "awake" with lights.

Tah Dah!! See...............the tools you use decorating a cake do not have to include $100 (with Christmas money and a 50% off sale) cutting devices. It can just be your IMAGINATION and INGENUITY and you are golden........


This cake was Chocolate Chocolate Chip with Vanilla Buttercream and Vanilla Fondant - plus a little Royal Icing for deco. Well received and big applause from the friends who ate it!

Tuesday, April 26, 2011

Garry & Patrick........

Whoops - I thought these went out months ago!! These were the cutest ever cupcakes (in my opinion). The day that I did these I had 2 extra children......and they did so so so so so well with The Line that it made things easier for me to get them done.

What is The Line? Haven't I talked about that before? Oh. Well The Line is very well known in my house. Generally The Line was invented to help children from getting into trouble. Although if you asked the children they might say that The Line was invented to keep them away from the fun.

See early on - when making cakes wasn't happening as often - the kids had kinda free reign in the kitchen. I mean anything I was baking was for my family. So I wasn't really worried about germs. Well...........I was worried about germs if the bakery good was going out of the house or being used for a party. But in the first few years of living here in Central Illinois we weren't having many parties - so baking was mostly for us. If the kids stuck a finger in the batter I wasn't too worried. I mean batter fingers and licking spatulas is the best part of baking for a kid anyway right? Who wants to take that away?

Then when I began to make cakes for others as favors the kids still had the same mindset of where the comfort zone was for touching things. In my mind the understanding was pretty clear cut - If The Cake Is For Someone Else...........WE DON'T TOUCH. They didn't seem to get that. In fact I remember one day where I had just mixed a batter.......Ben came in and literally STUCK his face into the bowl and sniffed in REALLY REALLY DEEP and complimented me by saying, "That smells great". All I could think was GROSS!! Dave was there with us and explained to Ben how gross that was and how he just spread germs all over the batter. Ben pointed out how he didn't touch the batter or sneeze on it (yes, this has happened in the past). So we explained how little things can still drop from a persons closely placed face in bowl. Ben apologized and left. I turned around and Kid You Not! Dave has his face in the bowl breathing in really deeply and says, "That does smell great."

Seriously? Batter thrown out. The Line invented. In our kitchen we have an island. Our kitchen is kind of an L shape. The island starts at the long stretch of the L. Inside the L there is the island (duh), sink, fridge (not the British rock band) and stove - and all cabinets. When I am baking or decorating a cake The Line goes up. This means basically that they can enter the kitchen and exit the kitchen onto the porch.......but they can not walk through the portion of the kitchen that has anything useful or interesting to them. Which can be hard.

At first.........during The Line training.......I would have to repeat "There is a line here" and physically swoop my arm from the wall - across the floor and end of the island - to the wall. Over and over we did this. About 5 cakes in the kids began to come into the kitchen and would see ingredients on the island and ask, "Is The Line up?" Thus The Line became its own "thing"


When I was making these fun cupcakes the Grey boys were here. These weren't the first kiddo's to visit when I was baking.......but they were the best at responding to The Line. Good job Pennie! When Andersen told the oldest Grey that there was A Line.....he looked for it - pretended to see it - push against it - made fun of it - but he NEVER crossed it! And that is all that counted........because honestly and invisible line is kinda funny - necessary - but funny.


Patrick was my favorite cupcake of them all. At first - when I cut his body out with a star - all it looked like was A STAR. Then as I added more items and moved his arms and legs about he began to really look like Patrick!


With The Line up - the kids paying due respect of The Line and Dave bringing home lunch - these were pretty quick to be made!


The cupcakes were Chocolate Chocolate chip and White cake - all with a Vanilla Buttercream icing and Vanilla Fondant.